Search This Blog

Wednesday, January 28, 2015

Naughty Dog!


So one of my sweet coworkers brought me this fiasco the other day:


She bought the pillow at a bargain and wanted to know if it could be mended.  Who did this? 

The culprit:

Who, me?
Meet Allie, the naughty little dog who apparently does not like burlap.  She seems to be denying culpability with that sweet face, doesn't she?

Well, it turns out that I don't like burlap either!  It does not get along well with my sewing machine, so I tackled this problem primarily by hand. 

I started by cutting away the affected portion of the ruffle. 


Another coworker was kind enough to donate some of her burlap ribbon to the cause. I cut a length of the ribbon long enough to replace the section I removed.

It was my intent to salvage the binding as best as I could, because I knew it'd be difficult to match a different fabric.  That's where my trusty seam ripper comes in again:

 
This actually turned out to be quite messy (burlap fibers everywhere!), but was surprisingly quick and easy. 
 
 
I gave the binding a good press with my iron and attached it to the new length of burlap.  It turns out that clips work much better than pins with burlap.


I had my walking foot on my machine from another project, so I opted to leave it on for this one.  It actually helped a lot, I think.  I had zero problems stitching the binding onto the burlap.

I then fashioned a similar ruffle in the gap on the pillow and used by big Wonder Clips to hold it in place. 

 
It turned out to be super easy and quite fun to stitch it on by hand because of the natural grid burlap has.  It makes me wonder how it would look to be embroidered...
 
 
And here's the end result:


Not too shabby, huh?  I'd say my first experiment with burlap was a success.  I'd love to hear about any interesting repairs you've had to make!
 
Until next time, God Bless!


post signature


Sunday, January 25, 2015

Scripture Stitches: Proverbs 31:8-9


I am super excited to present my very first block of my own design:


So excited, in fact, that I'm giving the pattern away!  It's my hope to make an entire hand stitched quilt with verses that speak to me.  First up: Proverbs 31:8-9, which reads:
New Living Translation (NLT)

8 Speak up for those who cannot speak for themselves;
    ensure justice for those being crushed.
9 Yes, speak up for the poor and helpless,

    and see that they get justice.

This verse is particularly troubling for me, because I don't feel like I'm doing much "speaking up" right now. As you all probably know, I'm an attorney. Yes, I indirectly seek the best interests of our State's children through my employment at the State, and I absolutely feel good about what I do for a living, but there could be a lot more.  This verse serves as a reminder that God has a bigger plan.  I tend to busy myself with my own desires--I get so bogged down with family, hobbies, and having fun that I can be completely oblivious of the injustices of this world.  

My prayer as I stitched this block was to be more in tune with Him, to in turn be more aware of what breaks His heart, and to care enough to say something about it.   Can I get an Amen?!

Now for the stitching.  Here's the first draft of this block that I stitched back in June of 2014.  Back then, I was convinced that I was going to embroider the entire thing.  Ha.


So back to the drawing board:


Fast forward to 2015, and I've actually got some fabrics in my stash.  I decided to give this block the improv treatment:


I randomly stitched a piece of teal and white together, then stitched another piece of white:


My guesses were totally off, so the block ended up quite a bit smaller than I had hoped for.  We can work with that, though.  That's what borders are for!

After abandoning my embroidery approach, I decided to applique instead.  I used the usual paper-backed fusible web approach.  As usual, I used Pellon Wonder Under and traced my sketch to the smooth side.  Following manufacturer instructions, I ironed it onto the wrong side of the fabric I chose for the scales of justice:


I then cut out my shapes and arranged them on my block as desired.  You can see in this picture that I've already traced my embroidery pattern onto the block to aid in the applique placement:


I used a Sewline pencil to trace my embroidery designs, but you can use whatever method you prefer to transfer your design.

I then ironed down the applique shapes using my wonderful little Mini Iron:


If you know anything about using Wonder Under, you probably realize that I'm not exactly following their instructions, but hey, it works for me.

I used 12 wt Sulky thread and did a blanket stitch around the applique shapes by hand.  Then comes the embroidery:


I used regular 6-strand embroidery floss and a split stitch to outline the letters.  I then did a small running stitch inside the letters for a stipple-like fill:


I thought that added a pretty nice effect, don't you?

All in all, it's not too bad for my very first design, no?  I hope you'll try it.  Get the pattern here.  I simply ask that you respect my rights as the creator of the design and not pass it off as your own.  Give credit where credit is due!

A few notes about the pattern:

  • I stitched mine onto a 9" x 9" block.  You should cut your block a little larger than the desired size, just in case there is any shrinkage when you applique and embroider.  You certainly don't have to use a 9" x 9" block--feel free to resize the image to fit your needs.  
  • Remember that when using fusible applique, your image will be a mirror image of the printed image.  If you look at my finished block, you'll see that it's the opposite of what is drawn on the pattern.  
  • The pattern does not include any seam allowances; if you are using a different applique method, you will need to add your seam allowance.
  • While I drew lines through each component of the scale, you will note that I applied the scale in one piece.  If you will be appliqueing it piece by piece, add a 1/8" underlap to your pieces to eliminate gaps.
  • If you have questions or feedback, email me!  


 Until next time, God Bless!


post signature

Saturday, January 10, 2015

Name Tag Challenge

So the Lakeland Modern Quilt Guild kicked off the new year with a challenge: create your own name tag.  There were a few parameters that weren't exactly strict requirements, but suggestions: it had to be small (3" x 4" was suggested), and would preferably contain the guild's color scheme.

I immediately got to sketching:

Good thing I sew, not draw!
 Our guild printed up little labels with our logo to incorporate into the name tag.


Never too old for colored pencils!
I keep a spiral-bound sketch book for all of my ideas.  So far, I'm glad I have, because every time I open it, I find a design I sketched out and forgot about.  It doesn't have to be perfect, but is just another way to document your creativity as it hits you.

As you can see from my sketch, I wanted to hand embroider my name, because that's kind of my "signature" skill.  I typed out my name using the font "cheri liney," and traced that onto some white cotton.


I just used a Sewline pencil to trace my name, under the assumption that it's erasable if I don't cover it completely with thread.


I used a cotton 12-weight thread in the Sulky blendables line.  I cannot begin to express how much I love this thread.  As promised, it's the same thickness as two strands of embroidery floss, making it perfect for all kinds of embroidery.  I have yet to be brave enough to thread it through my machine, but I'm sure that when I do, there will be another blog post with me gushing over it.

Can you tell that I'm just a little bit obsessed?

I buy it whenever I can, but that simply isn't enough!  And full disclosure, Sulky has no idea that I'm writing this--I just truly love this thread.

Anyhow, this particular variegated thread made for absolutely gorgeous satin stitching:

Satin stitches in progress!

Yes, my name is spelled with two Ls.  
I am absolutely smitten by the results.  I just keep impressing myself!

I then pieced together the background of the name tag and sewed it to a piece of Peltex, rather than batting.  I really like the stability the interfacing provides.


I decided to try my hand at improvisational piecing.  I dug through my treasure chest to find matching scraps and assembled a strip:


I decided to bind the name tag, rather than just piece a border, because I wanted the back to be interesting as well.  I trimmed the strip down to around 3 inches and began to bind the name tag as you would any other quilt.


I made the strap out of some leftover pre-packaged bias tape I had laying around, and stitched it shut with a zigzag stitch to add some interest.

This is where my genius hubby comes in.  It was getting late and I was getting tired, but I had this whole other idea sketched out for a second name tag:


Yes, that says chalk fabric.  I love this stuff!  I'll be sharing other projects I've used it on soon, but I really wanted to have a unique name tag that I could change.  My husband inspired me to make my name tag a two-in-one, and that's exactly what happened!  I present to you my completed guild name tag:


I embellished the background with some cute sewing-themed buttons, even adding a little more hand embroidery to act as "thread."  

Flip it around, and there's a chalkboard on the back, complete with a sleeve to hold a piece of chalk! 

Because some days, I just don't want to be Nicolle.

I can't wait to rock this thing at all of the guild functions.  What do you think?  Does this inspire you to make something else?


post signature

Thrift Shoppin'

Check out my recent thrift shop find: (cue Macklemore in the background)


I'm not usually one to go thrift shopping or yard sale shopping, but every once in a while I get the shopping bug when I don't have much cash. The solution: thrift shopping!

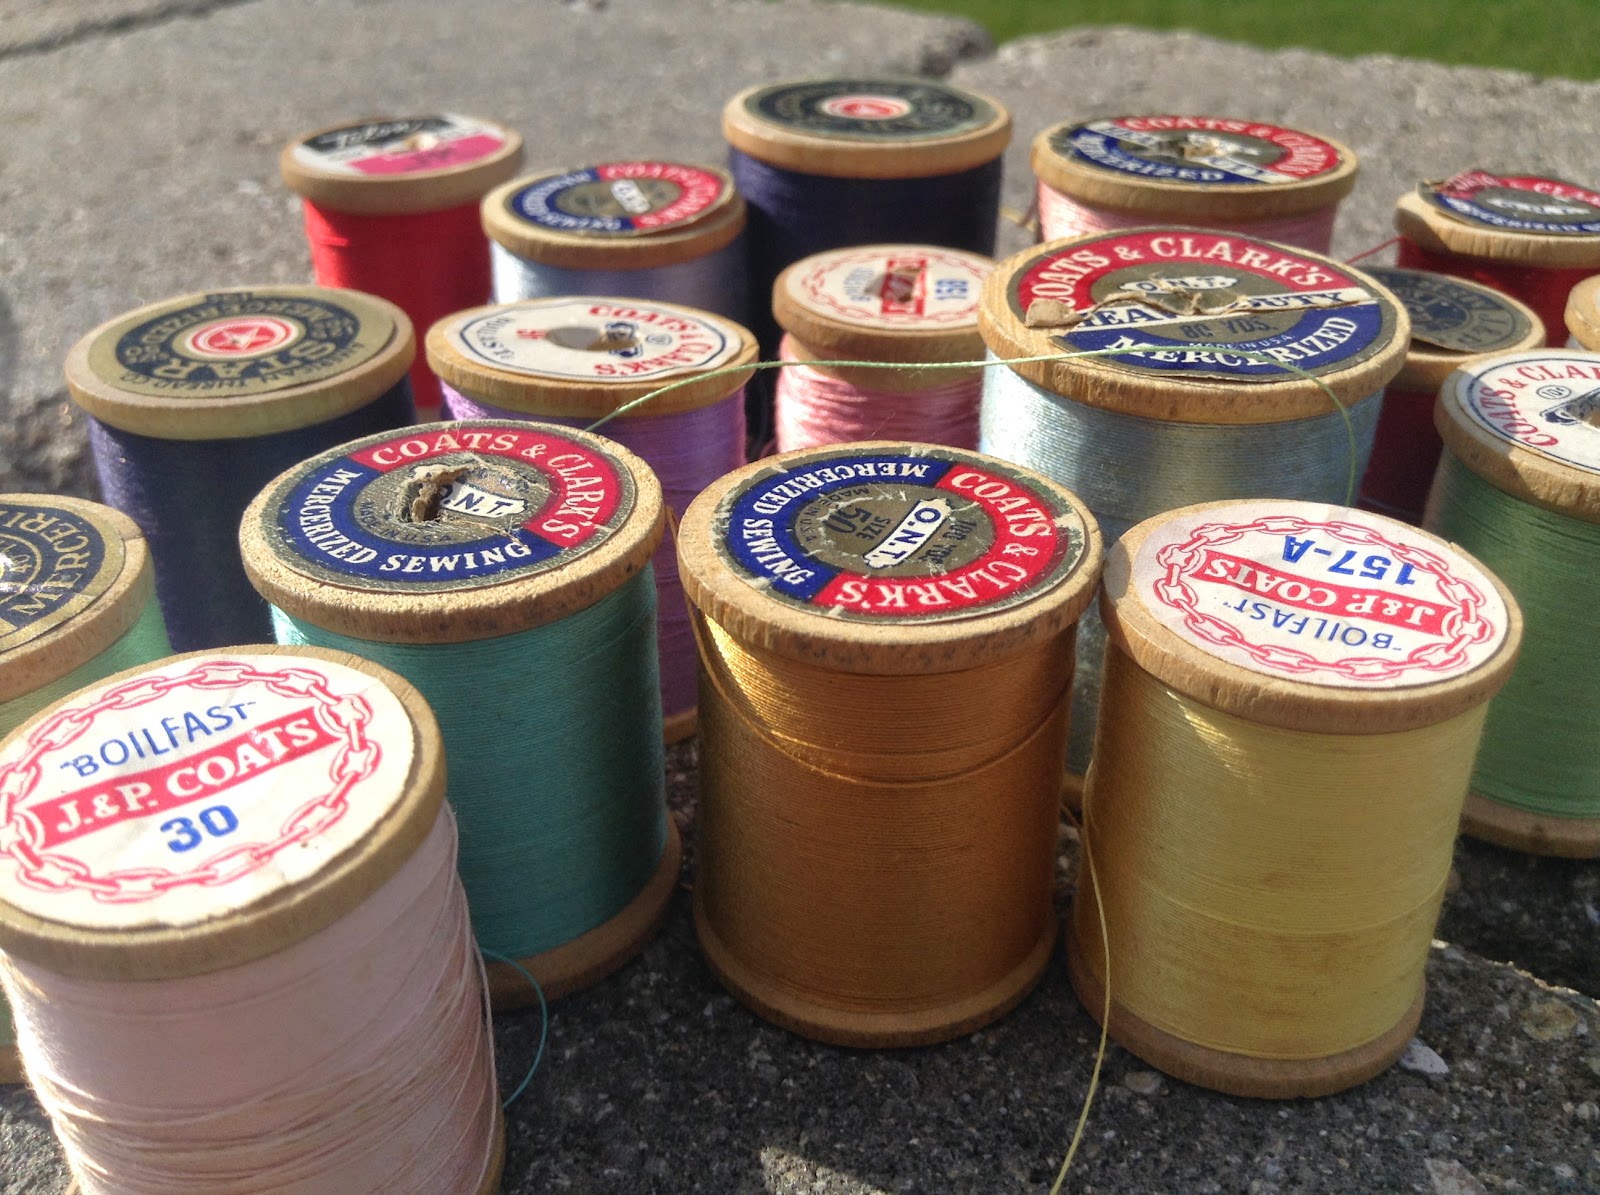
I scored this sewing kit from the Lighthouse Ministries thrift shop right outside of my neighborhood.  I can't usually find sewing-related items at thrift shops, but I hit the jackpot with this particular find.


I was very excited to find several vintage needle books, with most of the needles intact!  If you know me, you know that I do a lot of handwork, so I won't be hoarding these, I'll be using them.  They apparently used to make all needles with the gold eyes, and I'm super stoked about using them.


Recognize these brands?  I know Coats doesn't have the best reputation in the Q-niverse lately, but I'm sure, as with most things, they don't make it like they used to!


And yes, my friends, those are wooden spools! There's just something exciting about pulling thread off of a wooden spool.  For the most part, it all seems to be in very good condition, so they'll be featured in a project soon, I hope!

What about you?  Do you thrift shop/yard sale?  What kind of gems have you found?  I'd love to know!

Until next time, God Bless!

post signature